homemade epic hot chocolate
- on: November 22, 2015
- By Gabi
- theme: family life, from our kitchen, handmade
 0
0
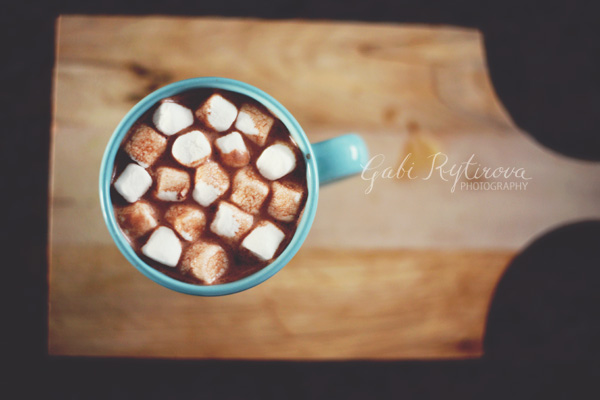
Who doesn’t love hot chocolate, right? Since we tried Jamie Oliver’s homemade epic hot chocolate recipe, we haven’t looked back. I would not go for the store bought anymore. This is the one and only recipe we use at home and everyone in our family loves it. It’s fun to make it from scratch too, kids love to help with grating the chocolate and eating the little pieces left. It’s thick and simply amazing.
We just did ours yesterday and put the mix in a large glass jar. We multiplied the recipe by 4 so it will last for a while.

Jamie Oliver’s Epic Hot Chocolate
- 2 tablespoons Horlicks
- 2 tablespoons cornflour
- 3 tablespoons icing sugar
- 4 tablespoons quality organic cocoa
- 100 g good-quality dark chocolate (70% cocoa solids) , finely grated
- 1 pinch ground cinnamon
- 1 pinch sea salt
- 2 pints (1 pint = 2 cups) semi-skimmed milk
Pour the milk into a large pan, and bring almost to the boil over a medium heat.
Meanwhile, add all the chocolate mix ingredients to a large jar and give it a good shake to combine. You need around 10 heaped tablespoons of the chocolate mix for this amount of milk. Simply spoon the chocolate mix into the hot milk, give it a good whisk and leave to bubble away for a few minutes before serving. You’re looking for that gorgeous, thick, almost claggy, knockout texture.
homemade lip balm
- on: November 21, 2015
- By Gabi
- theme: aromatherapy | essential oils, creative living, handmade, natural, self care
- 2
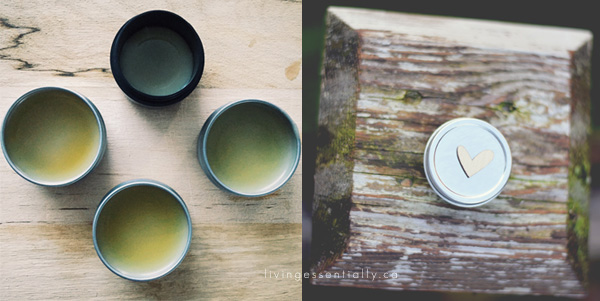
I finally did it.
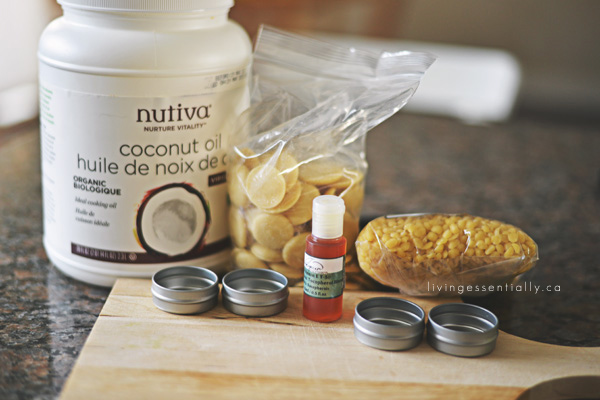
After pinning a lot of recipes on my essential oils pinterest board and reading through some awesome websites, I took a leap and made my first homemade skin care product. A lip balm. Ms. K has always dry lips during the fall and winter months and because it’s getting cold outside, this was the perfect project and introduction into making homemade goodies. I found several great recipes for lip balms and at the end decided to combine them. So this is what I used:
Homemade lip balm
Ingredients:
- 1 tablespoon of organic coconut oil
- 1 tablespoon of organic beeswax pastilles
- 1 tablespoon of organic cocoa butter (shea butter can be also used)
- 1 teaspoon of sweet almond oil (different carrier oils can be used as well, such as grapeseed, avocado, olive etc)
- few drops of vitamin E (I think I did about 5)
- 5 or so drops of lavender essential oil
- Using a double boiler (two pots of different sizes), combine the coconut oil, beeswax pastilles and cocoa butter and heat up until melted.
- Once fully melted, remove from the heat and stir in the almond oil, vitamin E and essential oil of your choice. Stir the mix until everything is completely combined together.
- Pour the mix into lip balm containers of your choice (we used tins but you can use also tubes) and let it cool down. Once the balm has hardened, it’s ready to use.
![]()
This batch made 4 lip balms which we put into 0.5 oz tins. You can multiply the amount of ingredients accordingly.
Note for next time – instead of using two pots I will use pot and glass measuring cup which will be easier to pour the mix from. I used 1/2 tablespoon “cup” for pouring my mix into the tins.
The beauty of homemade stuff is that you can experiment with ingredients of your liking. I’ve noticed that a lot of people are using peppermint essential oil in their balms, but I don’t like the taste/flavour of it so I didn’t include it in ours. Katrin likes vanilla so we added a few drops of vanilla extract (regular for baking) just for the taste. Next time we will experiment with honey as well. The balms turned out well. I love the smell and taste of it and so does Katrin. Guys don’t use lip balms too often but I bet when they will need them, they will be using them as well.
It was such a fun, easy and very quick to do project. If you have any favourite homemade goodies recipes, please share.
Leave a comment...for the love of handmade
- on: February 21, 2015
- By Gabi
- theme: handmade, inspiration
- 0
When I was a teenager and in my early twenties, I loved to wear a handmade stuff (and I still do a lot but unfortunately don’t do it too often!). I had a leather ring with a beautiful stone and I wore lots of different bracelets made from leather and beads. I also used to go to thrift stores to buy my clothes. I loved that I can have unique stuff and be different from others. I remember having a poncho sweater; I absolutely loved it and a lot of people asked me all the time where I got it. I also remember how it drove my mom crazy that I wear those clothes. Oh, those days…
I also loved to make stuff. I always created handmade gifts for my mom and my grandma for Christmas. I so miss those days! When life got into its way, my crafting time became less and less frequent and then it got to the point when I didn’t do anything craft/art related at all. I have a lot of Czech handmade pottery at home. Every time we go back to visit our family, I always bring a little something from my home country. It can be a mug, or a picture or something small which will make me smile every time I look at it and which will remind me of my roots. And it has to be handmade.
I have never been a girly girl but as I am getting older, I want to feel more feminine. Few weeks ago I asked my mom if she could send me some Czech handmade earrings. I can’t wait to see what she has chosen! My Birthday is getting closer and I was thinking about what to put on my wishlist. Then I discovered this little shop on Etsy a few days ago and I immediately fell in love with Linda’s work.
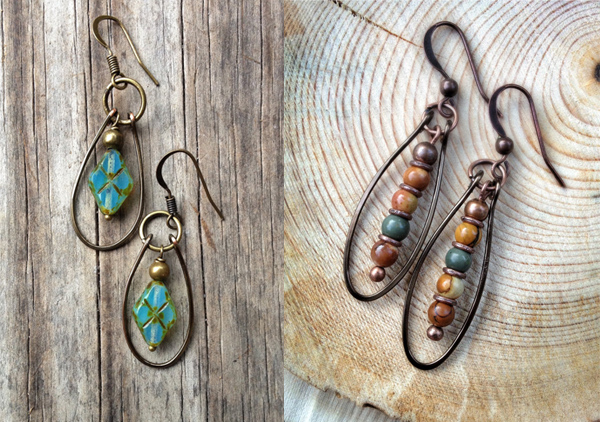
I knew right way that I want some of her earrings for my B-day. It was so hard to choose from all the variety! There are so many beautiful ones! At the end I ordered these two beautiful pairs. I can’t wait to receive them and wear them! The colors are my favorite, the design is beautiful and they are handmade. Win, win and win.
I feel an urge to create. I think I’m going to dig out the box with beads and create more of the wrap bracelets. I already promised my mom and sis that I will make some for them.
And I will definitely need a frame like this, this or this one.
What is on your to-do/ create list? Do you have a certain project on your mind?
Leave a comment...feeling creative | a sneak peek
- on: February 09, 2015
- By Gabi
- theme: creative living, handmade, inspiration
- 0
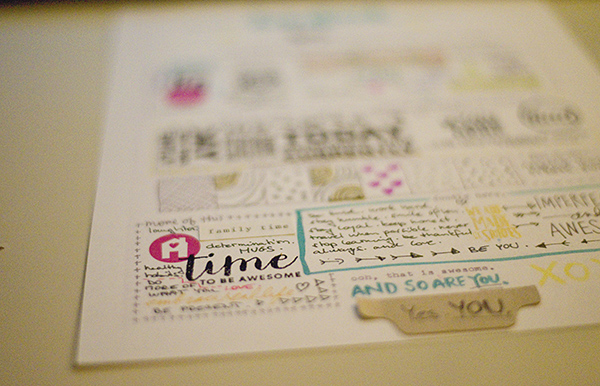
I mentioned on Friday in my five on friday post a handbook by amy tangerine.
It’s a long weekend over here; I had some time and felt creative today so I’ve started (and also finished my page). I have to admit that this is my first project of this type and I really loved the whole process. Stay tuned for the whole page reveal soon.
And if you decide to join me in creating a page or two as well (I know Harmony will!), please let me know in the comments as I would love to see what you come up with!
P.S. My apology for such a bad quality photo, it’s late and dark here.
Leave a comment...for the love of handmade
- on: June 26, 2014
- By Gabi
- theme: handmade, inspiration
- 2
My very good friend Harmony is incredibly talented and creative woman. I think she must be born with crochet hook and needles in her hands. Her handmade projects are beautiful and so precisely done, she leaves me in awe all the time. Harmony has recently opened her own Etsy shop called Creating Harmoniously and filled it with many beautiful handmade products.
You can find different styles of headbands there.
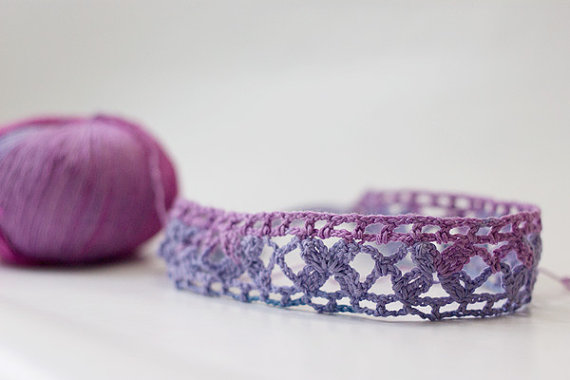
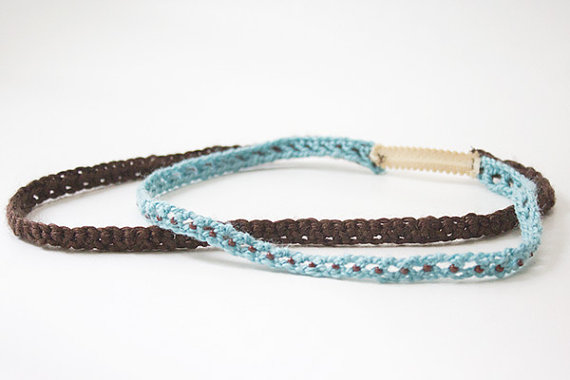
I have my very own headband made by Harmony as well. I’ve never been a girly girl so I decided to go for a brown one first to sort of get used to having something in my hair and to be able to match it with any color of my clothes.

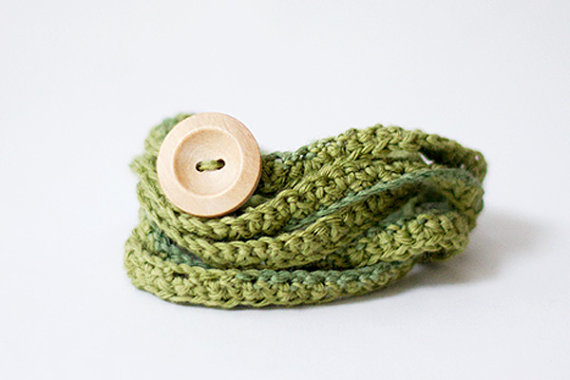
In her shop Harmony also sells bracelets,
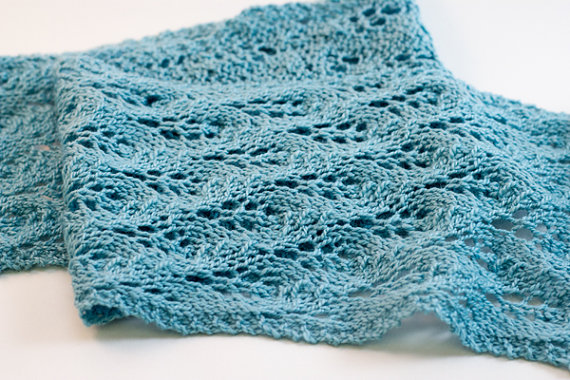
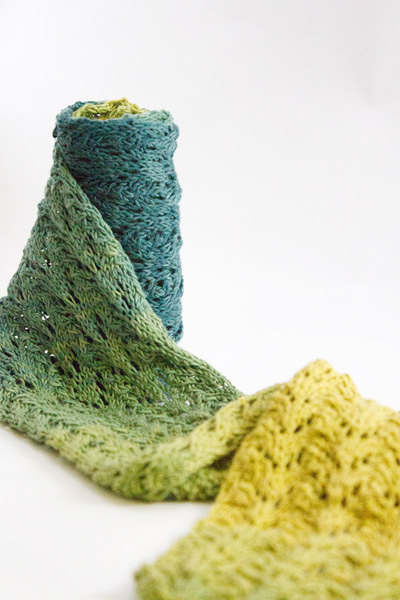
and beautiful scarves
hats, belts and handmade notecards
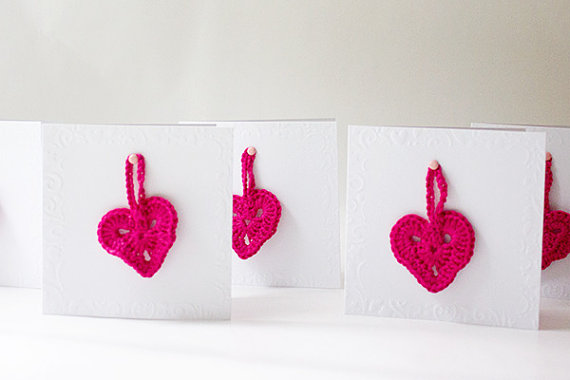
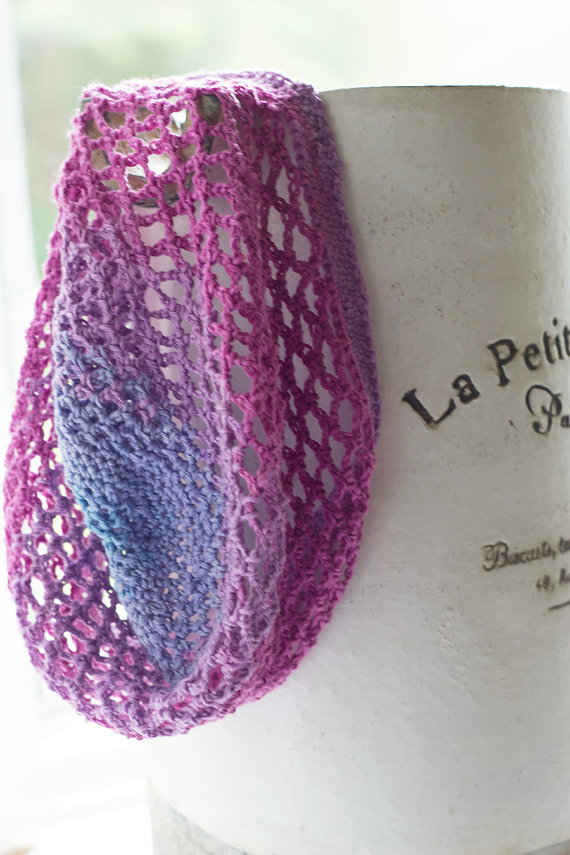
There is something for everyone! If you like receiving or gifting handmade products which are high quality and made by love, I definitely recommend you to explore Harmony’s shop.
You won’t be disappointed.
Leave a comment...
DIY | survival bracelet for kids
- on: May 19, 2014
- By Gabi
- theme: handmade
- 4
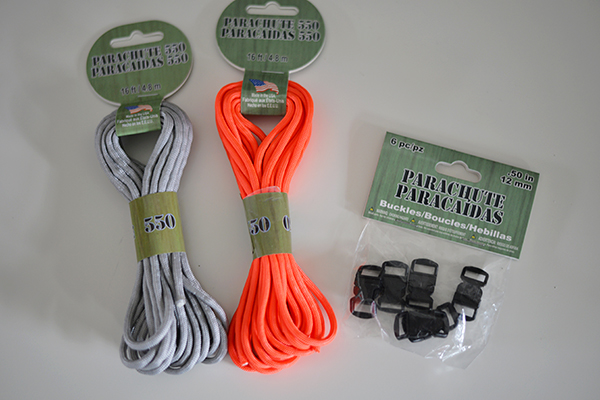
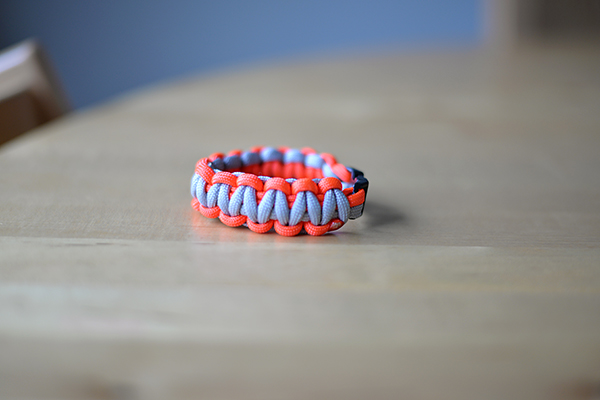
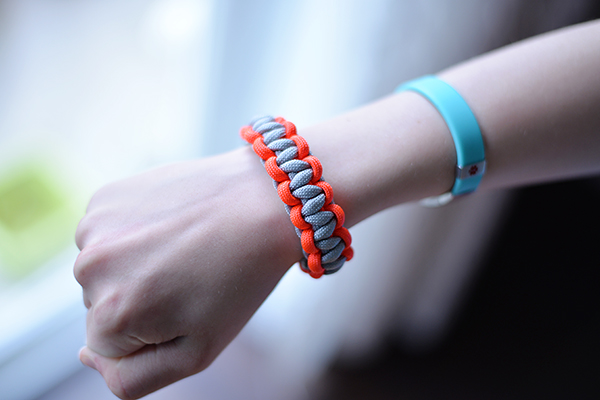
Over here we are big fans of Bear Grylls. We’ve seen several of his shows and are always looking forward to watch some new adventures of his. Patrik really likes Bear’s survival bracelet so he decided to make his own version of it. Well, Patrik’s bracelet is mostly a fashion thing but I think if he would need an extra cord in the woods, this 7 feet long paracord would be handy as well.
Yesterday we went to Michaels to get the stuff he needed for it. He ended up with orange and gray paracord and a little pack of buckles.
Then he found this awesome and a very easy to follow video for a cobra design and we just followed it.
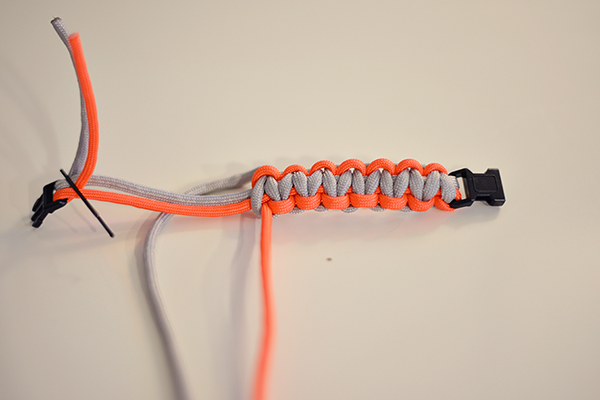
Within a few minutes the bracelet was done. It looks really cool, it’s easy to make and it might come handy during a hike. You never know when you might need an extra piece of a cord.
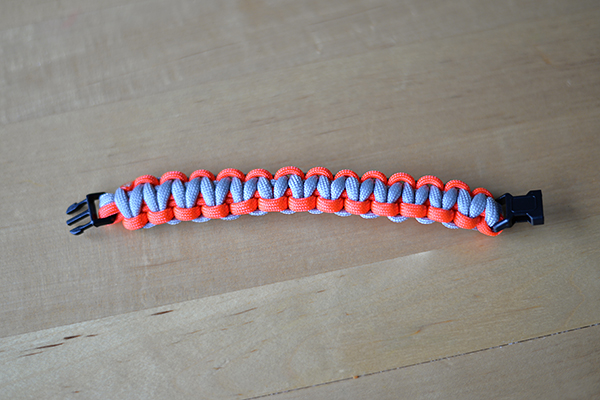
The most important thing is there is one happy boy.
DIY – wrap bracelet
- on: May 05, 2014
- By Gabi
- theme: creative living, handmade
- 6
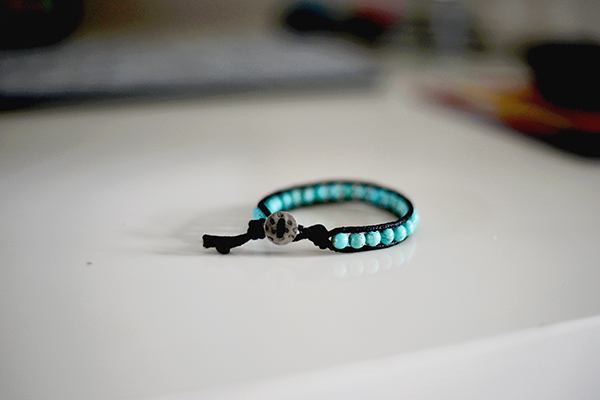
I had my eyes on the wrap bracelets for quite some time. There are many types and kinds available in online stores. I’ve decided that I won’t buy it but will make my own (which will be not just cheaper, but I will make it exactly the way I want). So few weeks back I went to Michaels and bought few strings of beads, cotton cord, bead thread and some buttons. All beads were just 45% off that week and the pinkish ones were even marked for clearance (for less then $2), so it was a steal. And I could also use a coupon for the thread and cotton cord ( double win!).
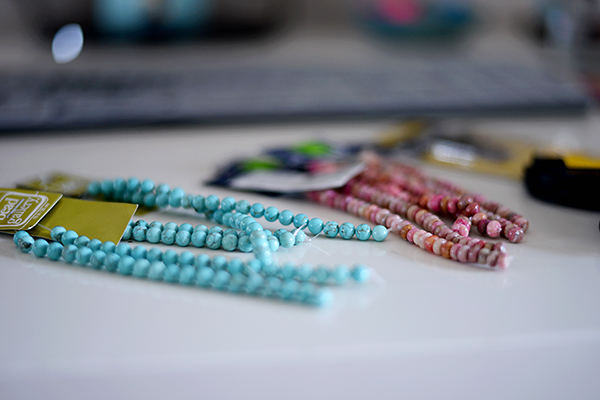
It took me several weeks to actually get to the project. Yesterday was the day. I googled several tutorials and at the end went with this one. And to be honest, I don’t think I followed it precisely, I just went with my instinct while wrapping the bead weaving thread around my cords. The rest was just a matter of patience.
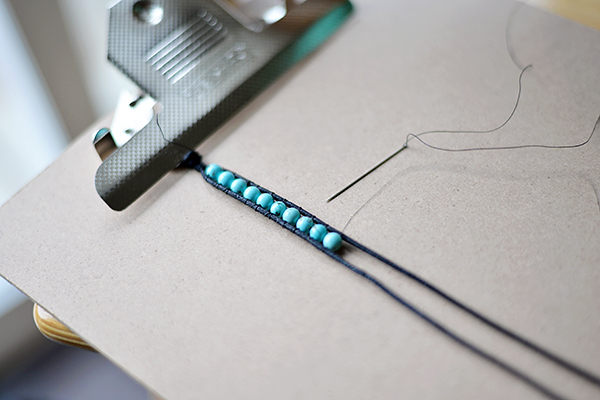
I’m really happy with the final result.

This one was the first “testing” one. I plan to make a multiple wrap, not just a single one and try different media.
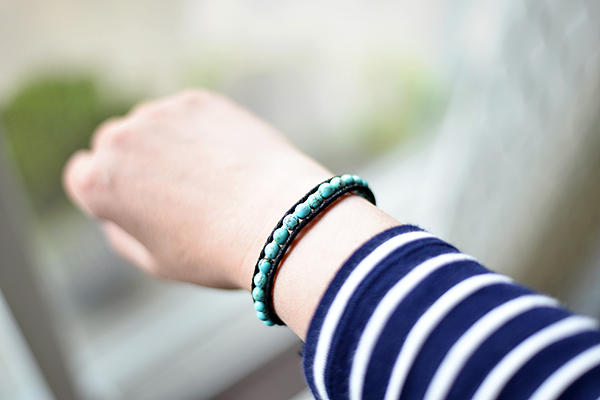
I bought a leather light beige cord last week which will go perfectly with the pinkish beads.The only thing I need to get is a light (natural/beige) bead weaving thread which they didn’t have at Michaels. It seems a little bit of searching has to be done.
Both kids already asked me to make bracelets for them as well which makes me excited to experiment even more!
Leave a comment...